IMX93 Camera Usage Guide
🚀 Introduction
This article guides you how to get started using TechNexion camera modules on IMX93 development kits.
You must have the background knowledge to modify the kernel configuration, rebuild, and replace the kernel and the device tree source (DTS).
This article uses the EDM-WB and AXON-WB baseboards as examples.
📸 Supported Camera Modules
- TEVS Series
- TEVM Series
| Camera Series | Products |
|---|---|
| TEVS | TEVS-AR0144 TEVS-AR0145 TEVS-AR0234 TEVS-AR0235 TEVS-AR0246 TEVS-AR0521 TEVS-AR0522 TEVS-AR0544 TEVS-AR0821 TEVS-AR0822 TEVS-AR0830 TEVS-AR1335 TEVS-AR2020 |
| Camera Series | Products |
|---|---|
| TEVM | TEVM-AR0144 TEVM-AR0145 TEVM-AR0234 TEVM-AR0235 TEVM-AR0246 TEVM-AR0521 TEVM-AR0522 TEVM-AR0544 TEVM-AR0821 TEVM-AR0822 TEVM-AR0830 TEVM-AR1335 TEVM-AR2020 |
🧩 Supported Boards
| SoM | Board |
|---|---|
| EDM-IMX93 | EDM-WB |
| AXON-IMX93 | AXON-WB |
🔧 Hardware Setup Instructions
1. Power Supply Preparation
- Use a DC 5V or 12V power cable to supply power to the board.
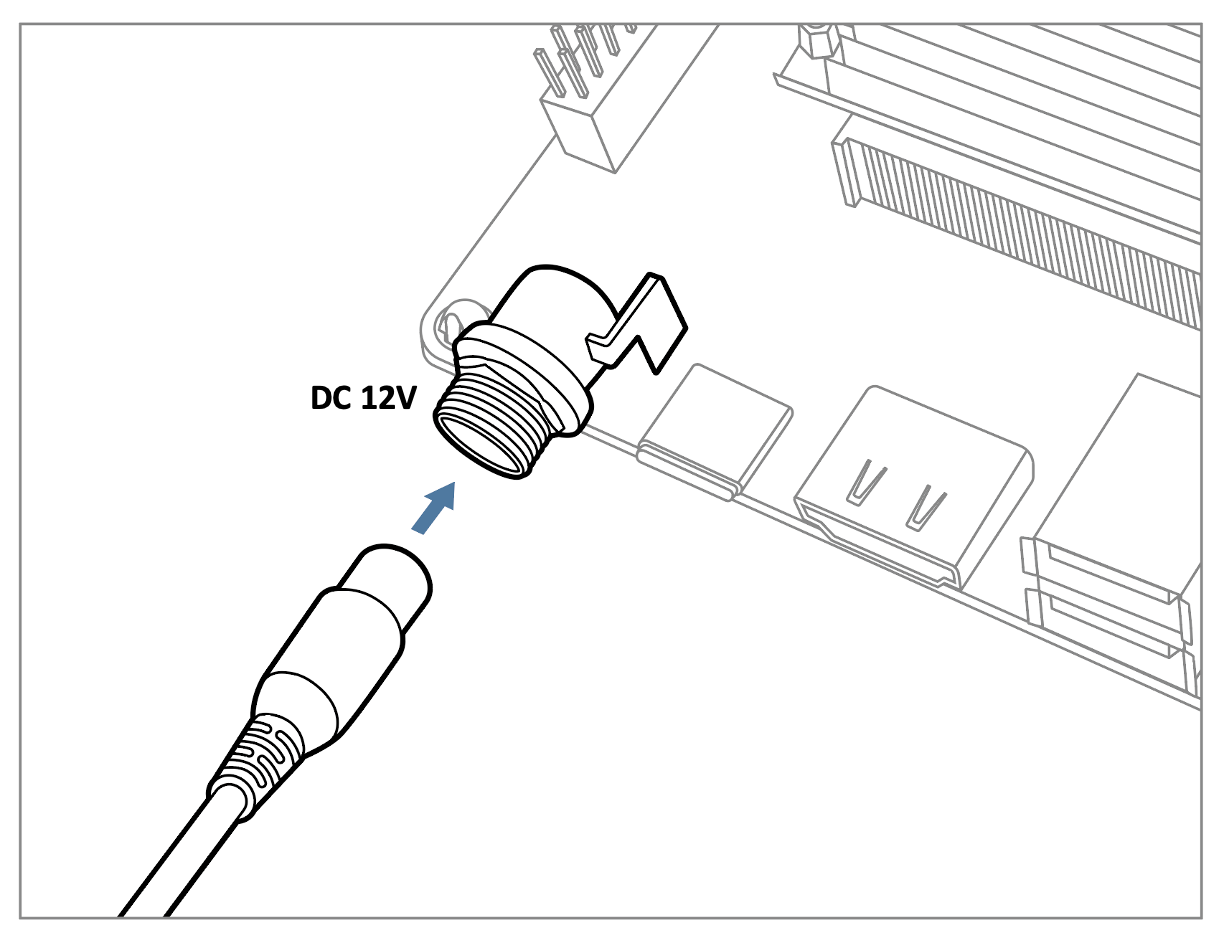
The EDM-WB and AXON-WB can also be powered via USB Type-C (5V).
2. Debug Console Connection
- Prepare a USB-to-UART cable if you're connecting to a PC.
- Connect the cable to the debug console port on the baseboard.
3. Camera Interface (CSI) Overview
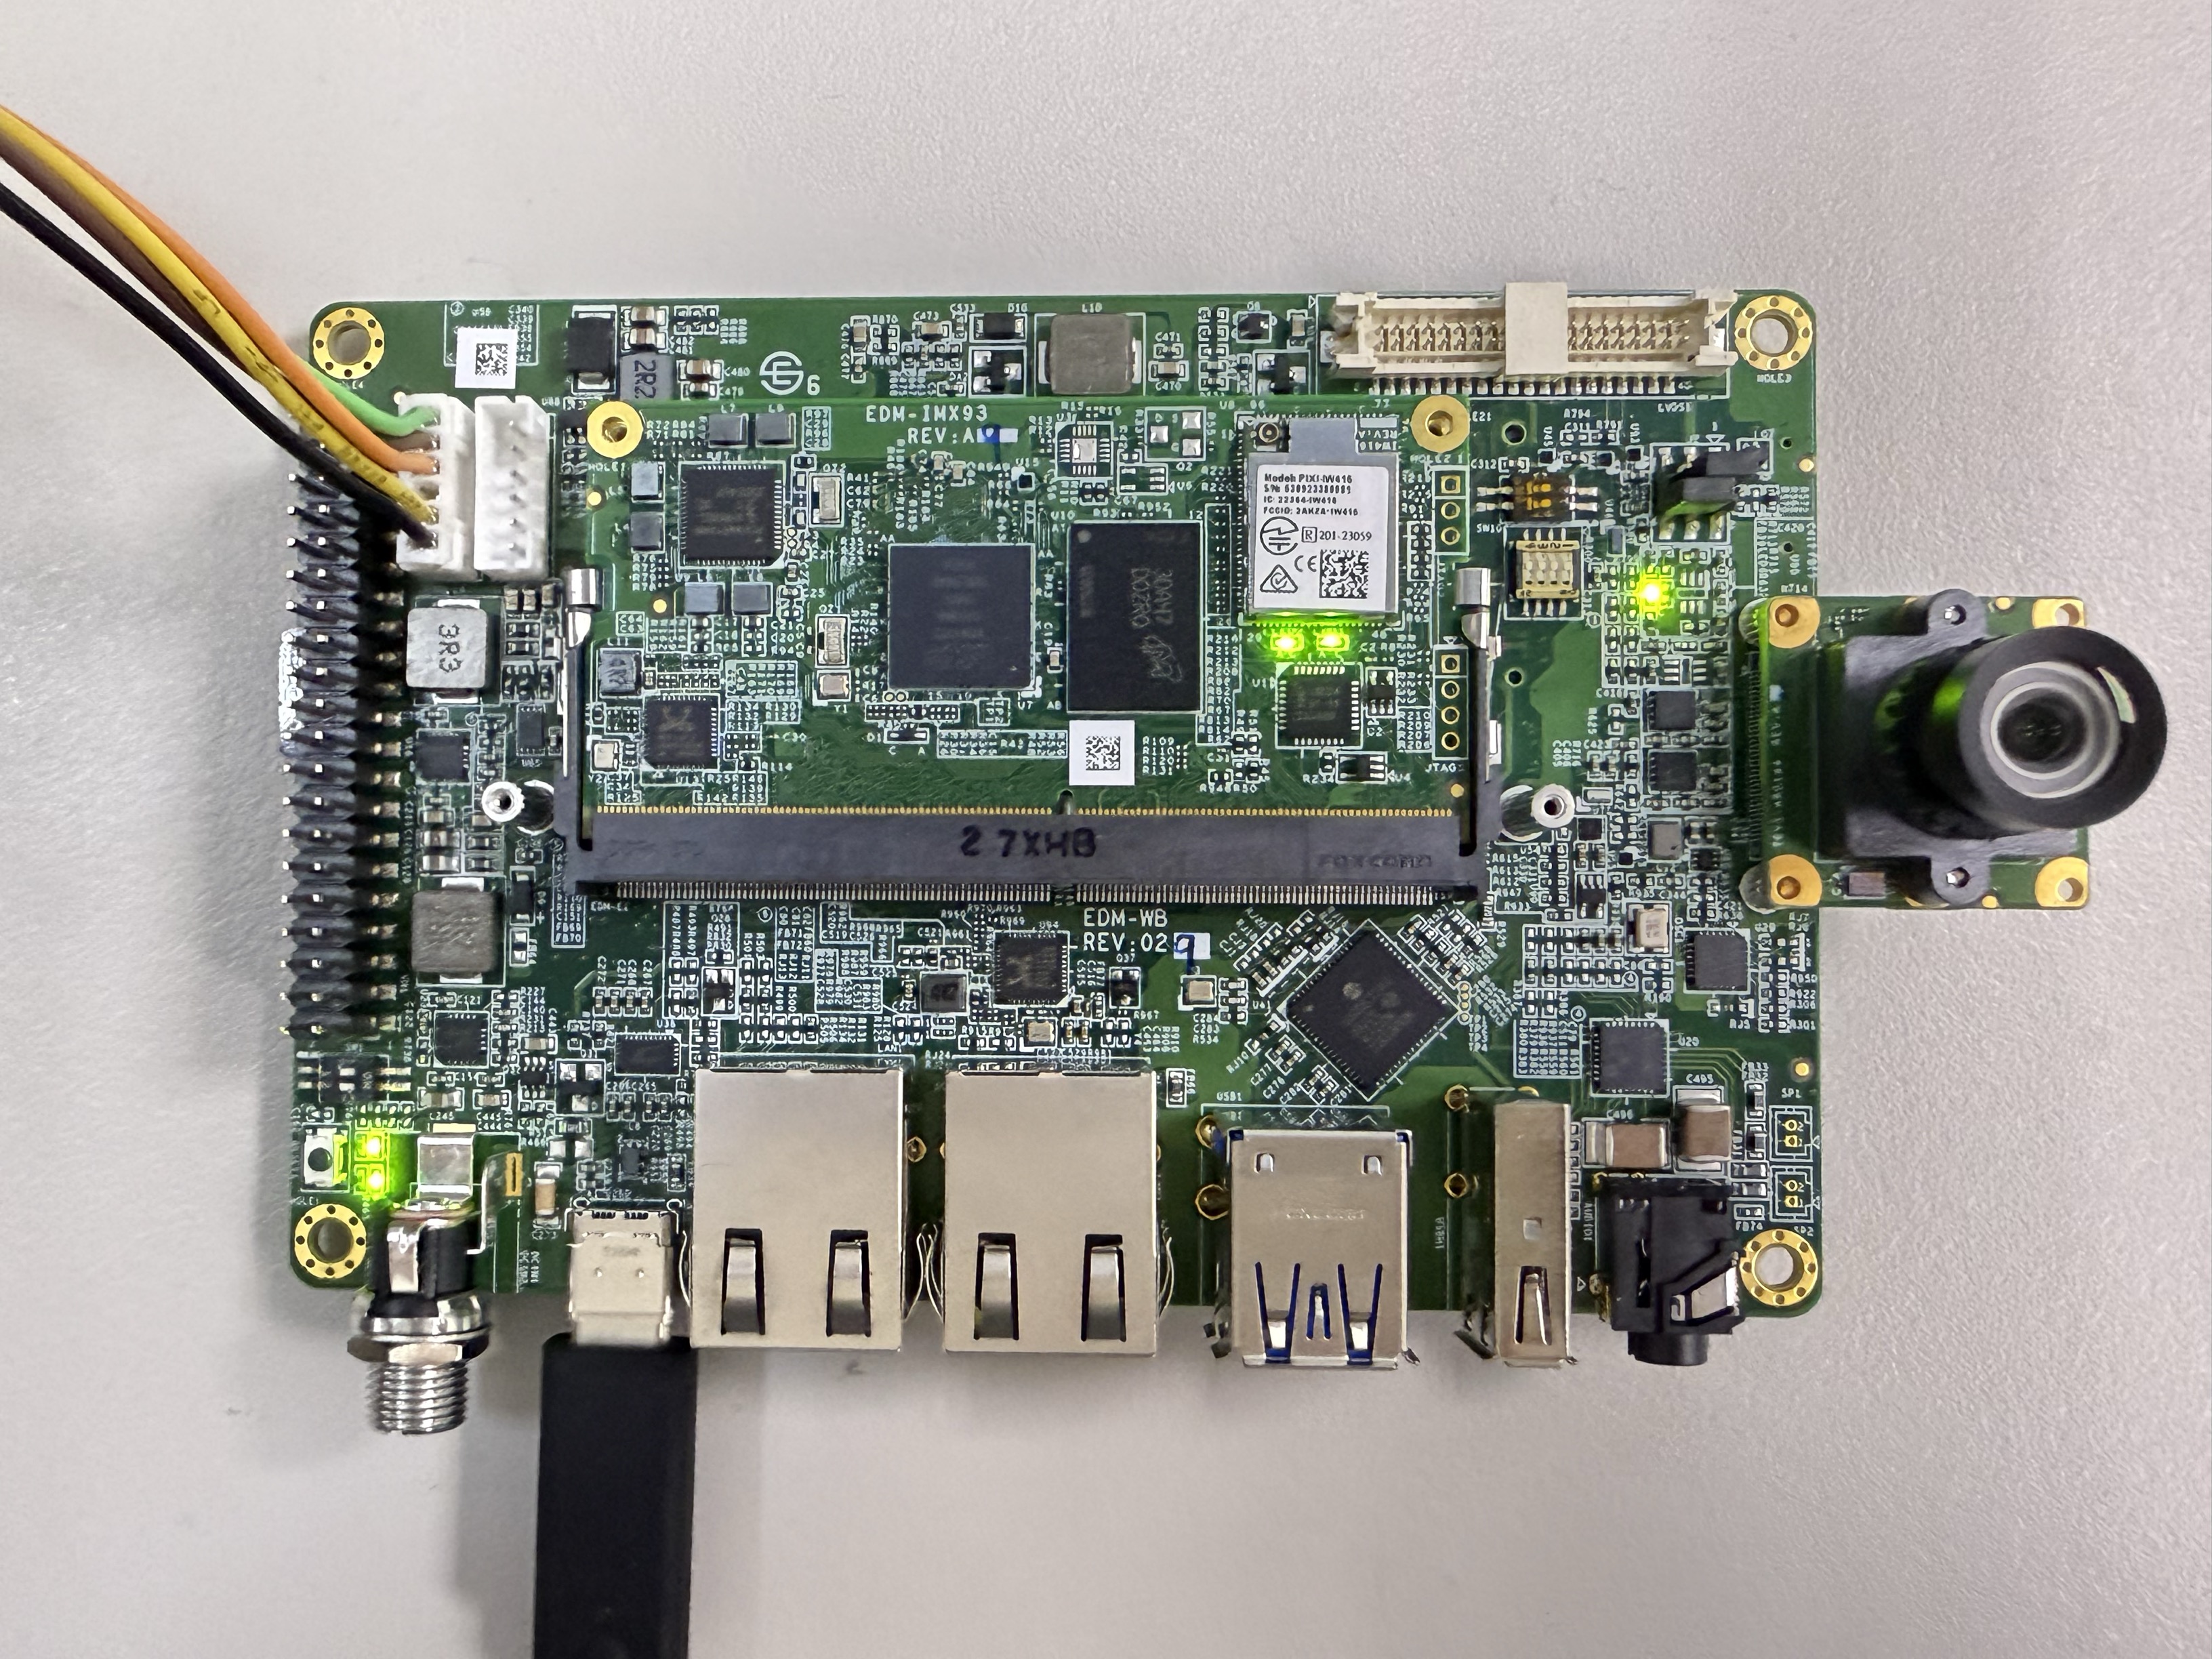
- The board features one MIPI CSI-2 interfaces, referred to as CSI1.
- These use 70-pin board-to-board connectors manufactured by Hirose.
- The image below shows a TEVS camera connected to the CSI1 interface.
💻 Prepare Yocto demo image for testing TechNexion camera
To test TechNexion cameras, you will need a Yocto-based demo image that includes the necessary device tree blobs and camera drivers.
🔽 Downloading the Demo Image
Prebuilt demo images are available for download on TechNexion's official server.
Download Link:
- EDM-IMX93
- AXON-IMX93
💾 Flashing the Image
You can flash the image to either e.MMC or an SD Card using one of the following methods:
1. Using uuu Tool (Universal Update Utility)
TechNexion provides a guide to flash the image using the uuu tool:
🔗 How to Flash with UUU
Before flashing, ensure the board is set to Serial Download Mode in the boot configuration.
2. Using ums Command in U-Boot (USB Mass Storage)
Alternatively, you can write the image directly to flash storage over USB-OTG using U-Boot’s ums command:
🔗 Using UMS in U-Boot
The board must be booted with a version of U-Boot that supports the ums command. Typically, this is done from the existing e.MMC.
🛠️ Build Yocto
TechNexion supports building a Yocto-based Linux image tailored for camera modules using the following kernel and branch.
📦 Supported Linux Kernel
| Linux Kernel Version | Yocto Branch |
|---|---|
| 6.1.55 | tn-imx_6.1.55_2.2.0-stable |
📁 Source and Build Instructions
- EDM-IMX93
- AXON-IMX93
📸 Camera Testing Instructions
Specify Camera DTBO in U-Boot
If you are using TEVS cameras, you can skip this step. These models support automatic camera detection in U-Boot.
Manual DTBO Setup
-
Connect the debug console cable to the baseboard (via UART).
-
Power on the board and interrupt the boot process. Keep pressing
Enterwhen the following message appears:Hit any key to stop autoboot: -
Set the correct camera overlay (DTBO) using the U-Boot environment variable:
- TEVS Cameras
u-boot=> setenv dtoverlay tevs
- Save and continue the boot process:
u-boot=> saveenv
u-boot=> boot
Don't forget the append LCD overlay if the baseboard has LCD connections.
🎥 Start Camera Video Stream via GStreamer
Check Camera Availability
Use the v4l2-ctl tool to list connected video devices.
$ v4l2-ctl --list-device
Example output:
FSL Capture Media Device (platform:42800000.bus:camera):
/dev/media0

mxc-isi-cap (platform:4ae40000.isi:cap_devic):
/dev/video0
In this example, /dev/video0 is the capture device connected via CSI1.
Launch GStreamer Pipeline
Replace <res_w> and <res_h> with your desired resolution:
$ gst-launch-1.0 v4l2src device=/dev/video0 ! \
  video/x-raw, width=<res_w>, height=<res_h> ! \
  videoconvert ! \
  waylandsink sync=false
It not necessary to use or using videoconvert. Because IMX93 have ISI to convert format.
🚨 Troubleshooting
Ensure camera device tree blob overlay(DTBO) is specified correctly in u-boot.
- TEVS Cameras
  u-boot=> printenv dtoverlay
  dtoverlay=tevs
We can check whether camera have been initialized correctly.
For TEVS cameras:
  $ dmesg -t | grep tevs
    tevs 1-0048: tevs_probe() device node: tevs@48
    tevs 1-0048: Version:24.9.0.1
    tevs 1-0048: Product:TEVS-AR0144, HeaderVer:3, MIPI_Rate:800
    tevs 1-0048: probe success
    mx8-img-md: Registered sensor subdevice: tevs 1-0048 (1)
    mx8-img-md: created link [tevs 1-0048] => [mxc-mipi-csi2.0]
Ensure camera device tree blob(DTB) is specified correctly.
- EDM-IMX93
- AXON-IMX93
  $ dmesg -t | grep -i model
    Machine model: TechNexion EDM-IMX93 and WB baseboard
  $ dmesg -t | grep -i model
    Machine model: TechNexion AXON-IMX93 and WB baseboard