Seeed reComputer Robotics J401 with JetPack 6.2
Instruction
TechNexion Embedded Vision Solutions provide embedded system developers access to high-performance, industrial-grade camera solutions to accelerate their time to market for embedded vision projects.
Supported Camera Modules
| Camera Series | Products |
|---|---|
| VLS-GM2 | VLS-GM2-AR0144 VLS-GM2-AR0145 VLS-GM2-AR0234 VLS-GM2-AR0235 VLS-GM2-AR0246 VLS-GM2-AR0521 VLS-GM2-AR0522 VLS-GM2-AR0544 VLS-GM2-AR0821 VLS-GM2-AR0822 VLS-GM2-AR0830 VLS-GM2-AR1335 VLS-GM2-AR2020 |
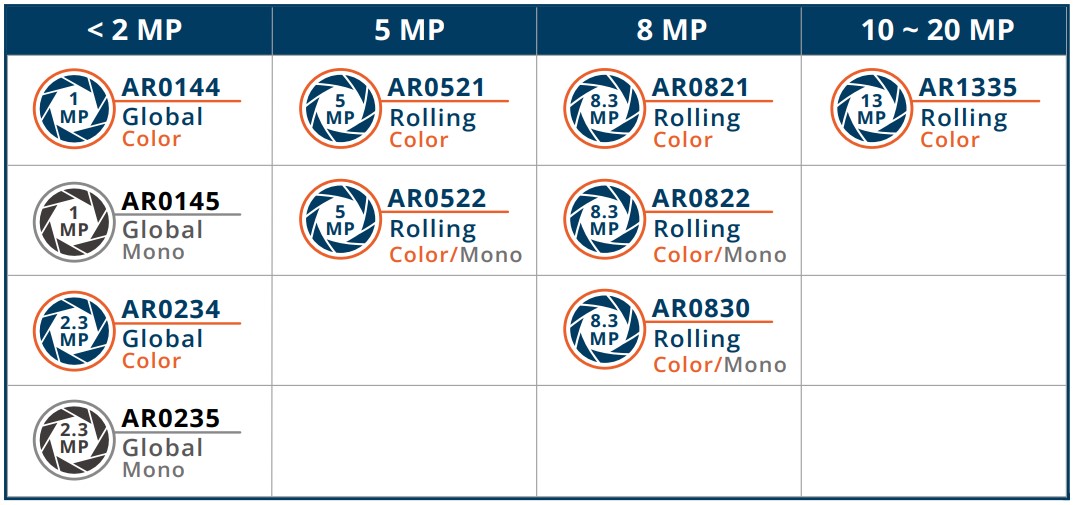
More Camera Products Details...
Supported NVIDIA Jetson Partner Platforms
Install TN Camera on NVIDIA Jetson Partner Platforms
Connect to NVIDIA Jetson Partner Platforms
COAX cable for VLS-GM2 Cameras
Connect VLS-GM2 cameras to the reComputer Robotics J401 GMSL Board directly.
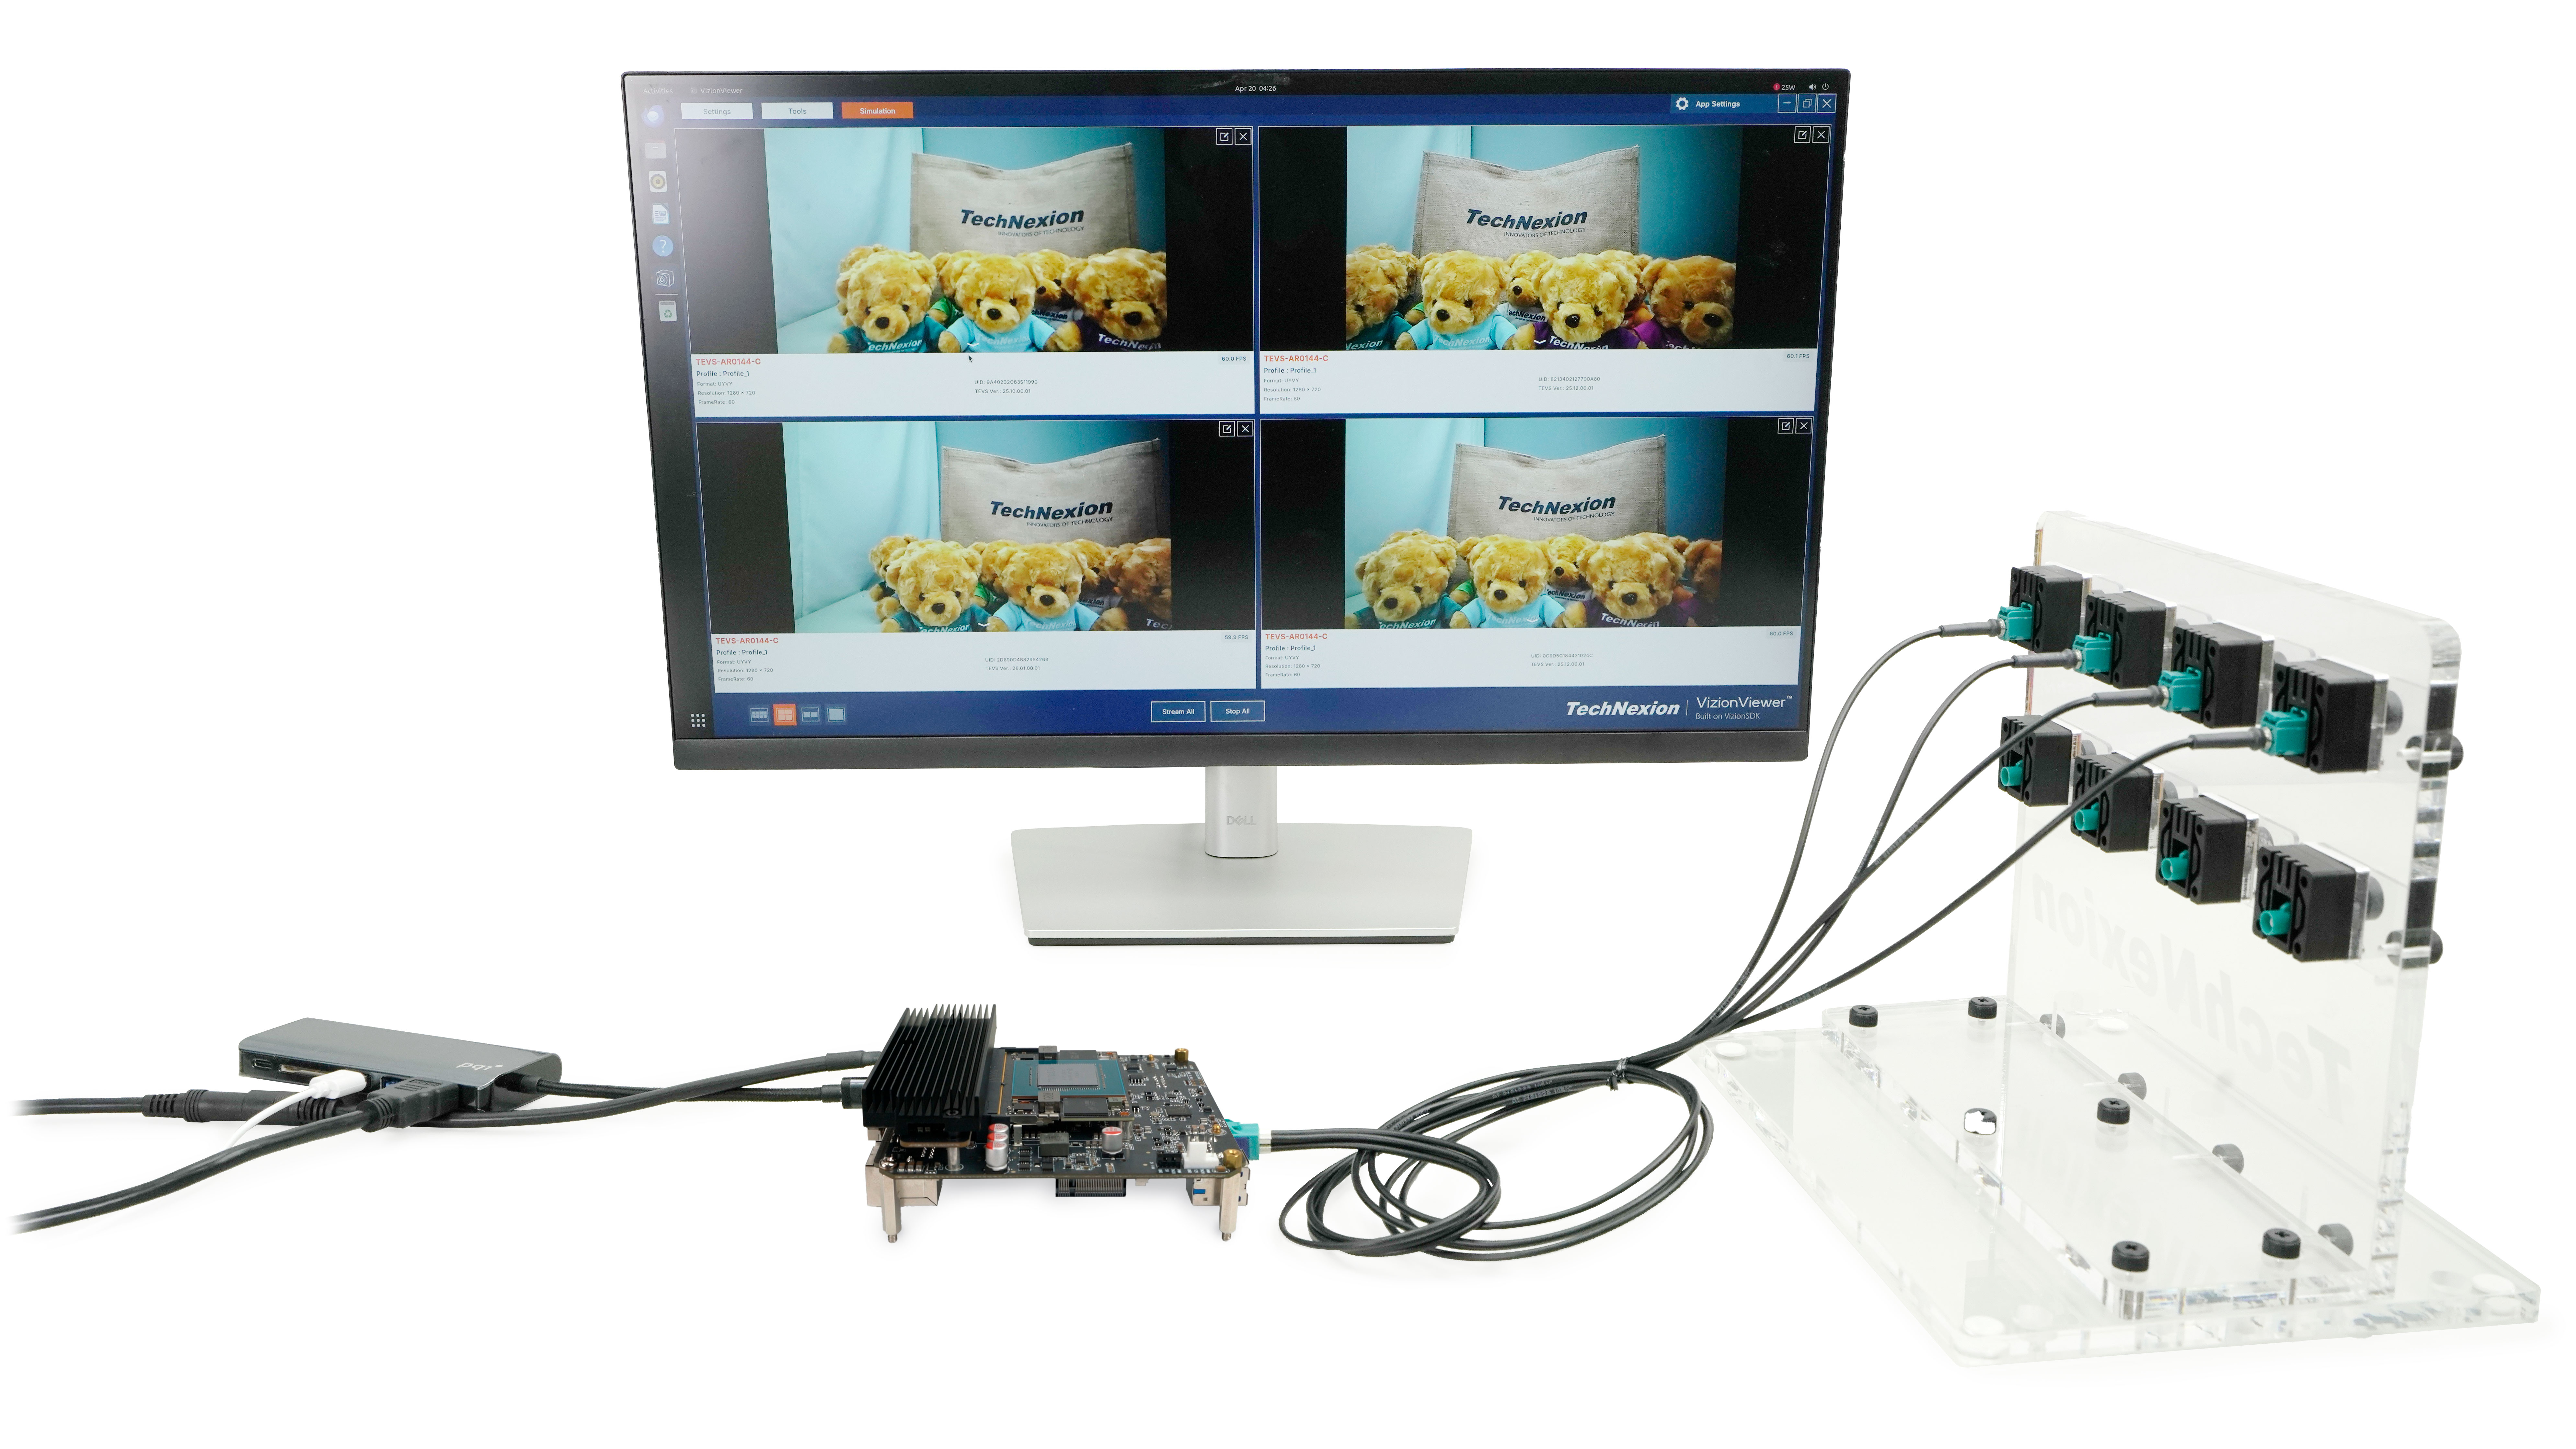
Follow the video tutorial below to learn how to connect VLS-GM2 cameras to reComputer Robotics J401.
Method 1 - Using TechNexion Pre-built modules
We recommend following the user manual from platform vendors to setup system. After that, you can follow the below method to install TechNexion Cameras Driver.
-
Download pre-built modules.
$ wget https://download.technexion.com/demo_software/EVK/NVIDIA/J401/pre-built-modules/latest/JP62/tn_camera_modules_jp62.tar.gz -
Uncompress the modules.
$ tar -xf tn_camera_modules_jp62.tar.gz -
Run installation script.
$ cd tn_camera_modules_jp62_<built_time>/
$ sudo ./tn_install.sh -
After you agree to continue the installation, the module will be installed to the system.
$ sudo ./tn_install.sh
****** TechNexion Camera Driver Installation ******
This installer updates TechNexion camera drivers, camera DTBOs,
and boot entries for NVIDIA Jetson Development Kits.
Back up your image before continuing.
Continue? [Y/n] Y
Reboot after installation? [y/N] n
Installing J401 JP62
Selected module: VLS-GM2
Installation summary:
  Kernel: 5.15.148-tegra
  Modules installed: 4
  Boot files installed: 2
  Default boot entry: vls-gm2
  Camera overlay: /boot/tegra234-p3767-camera-j401-vls-gm2-overlay.dtbo
  Camera boot entries: 2
Finish Camera Driver Installation.
Reboot the device when the user is ready.
You should reboot the device after installation.
Method 2 - Using TechNexion disk image
This disk image file is for VLS-GM2 with JetPack 6.2 version.
-
Download disk image.
$ wget https://download.technexion.com/demo_software/EVK/NVIDIA/J401/DiskImage/latest/mfi_recomputer-orin-robotics-j401-gmsl-tn-jp62.tar.gz -
Extract the image files.
$ sudo tar -xf mfi_recomputer-orin-robotics-j401-gmsl-tn-jp62.tar.gzYou will see a folder "mfi_recomputer-orin-robotics-j401-gmsl" in your current location.
-
The platform enters forced recovery mode and connects to the PC via USB.
-
Write the image files to the NVMe SSD.
$ cd mfi_recomputer-orin-robotics-j401-gmsl
$ sudo ./tools/kernel_flash/l4t_initrd_flash.sh --flash-only --massflash 1 --network usb0 --showlogs
Bring up Camera
TechNexion VizionViewer
Gstreamer
If you succeed in initialing the camera, you can follow the steps to open the camera.
-
Check the supported resolutions:
$ gst-device-monitor-1.0 Video/Source
Probing devices...

Device found:

        name  : vi-output, tevs 2-0049
        class : Video/Source
        caps  : video/x-raw, format=UYVY, width=640, height=480, framerate=60/1
                video/x-raw, format=UYVY, width=1280, height=720, framerate=60/1
                video/x-raw, format=UYVY, width=1280, height=800, framerate=60/1
                video/x-raw, format=UYVY, width=640, height=480, framerate=60/1
                video/x-raw, format=UYVY, width=1280, height=720, framerate=60/1
                video/x-raw, format=UYVY, width=1280, height=800, framerate=60/1
        properties:
                object.path = v4l2:/dev/video0
                device.api = v4l2
                media.class = Video/Source
                api.v4l2.path = /dev/video0
                api.v4l2.cap.driver = tegra-video
                api.v4l2.cap.card = "vi-output\,\ tevs\ 2-0049"
                api.v4l2.cap.bus_info = platform:tegra-capture-vi:2
                api.v4l2.cap.version = 5.15.148
                api.v4l2.cap.capabilities = 84a00001
                api.v4l2.cap.device-caps = 04200001
                device.id = 33
                node.name = v4l2_input.platform-tegra-capture-vi
                node.description = "vi-output\,\ tevs\ 2-0049"
                factory.name = api.v4l2.source
                node.pause-on-idle = false
                factory.id = 10
                client.id = 32
                clock.quantum-limit = 8192
                media.role = Camera
                node.driver = true
                object.id = 34
                object.serial = 34
        gst-launch-1.0 pipewiresrc path=34 ! ...

... -
Use the Gstreamer pipeline to launch a 1280x720 resolution camera (/dev/video0) via the CPU:
$ DISPLAY=:0 gst-launch-1.0 v4l2src device=/dev/video0 ! \
"video/x-raw, format=UYVY, width=1280, height=720" ! xvimagesink sync=false -
Use the Gstreamer pipeline to launch a 1280x720 resolution camera (/dev/video0) via the GPU:
$ DISPLAY=:0 gst-launch-1.0 nvv4l2camerasrc device=/dev/video0 ! \
"video/x-raw(memory:NVMM), format=UYVY, width=1280, height=720" ! \
nvvidconv ! nv3dsink sync=false
Troubleshooting
Cannot find cameras
If you cannot bring up the cameras, you can check if the video device does exist.
$ ls /dev/video*  # List all video devices
/dev/video0  /dev/video1
If you cannot see the devices, you should check if the drivers have been probed.
Occur Error: Could not get EGL display connection
If you occurred the errors nvbufsurftransform: Could not get EGL display connection by rununing the Gstreamer command, you can modify the parameter DISPLAY by the command:
# Check and Set environment parameter for 'DISPLAY'
$ export DISPLAY=$(w| tr -s ' '| cut -d ' ' -f 3 | grep :)

# Run Gstreamer pipeline
$ gst-launch-1.0 v4l2src device=/dev/video0 ! \
"video/x-raw, format=UYVY, width=1280, height=720" ! xvimagesink sync=false
no element "nvv4l2camerasrc"
If you encounter the following error:
WARNING: erroneous pipeline: no element "nvv4l2camerasrc"
This means your system is missing some NVIDIA GPU-related plug-in tools. You have to install some NVIDIA plug-in tools for Gstreamer.
$ sudo apt update && apt depends nvidia-jetpack | awk '{print $2}' | uniq | xargs -I {} bash -c "sudo apt -o Dpkg::Options::="--force-confold" -y install {} ; sudo apt clean"